入门
起步
引用
上手 Tiny.js 最简单的方法是使用 tinyjs-cli 来初始化。
你也可以创建一个本地 .html 文件,然后通过如下方式引入 Tiny.js:
<script src="https://gw.alipayobjects.com/os/lib/tinyjs/tiny/1.6.1/tiny.js"></script>
或使用debug版本:
<script src="https://gw.alipayobjects.com/os/lib/tinyjs/tiny/1.6.1/tiny.debug.js"></script>
Tips
你也可以直接使用 unpkg 上的 CDN 服务或将文件下载下来:
- https://unpkg.com/@tinyjs/tiny@1.6.1/tiny.js
- https://unpkg.com/@tinyjs/tiny@1.6.1/tiny.debug.js
新建App
const config = {
  showFPS: true, // 显示帧频
  dpi: 1.5, // 分辨率
  renderOptions: {
    backgroundColor: 0x2a3145 // 画布背景色
  }
};
const app = new Tiny.Application(config);
新建场景
class StartLayer extends Tiny.Container {
  constructor() {
    super();
  }
}
新建精灵
// 通过 fromImage 实例化精灵
const sprite = Tiny.Sprite.fromImage('https://gw.alipayobjects.com/as/g/tiny/resources/1.0.0/images/logo.png');
完整的DEMO
<!DOCTYPE HTML>
<html>
<head>
<meta charset="UTF-8">
<title>Tiny.js DEMO</title>
<meta name="viewport" content="width=device-width, initial-scale=1.0, maximum-scale=1.0, minimum-scale=1.0, user-scalable=0" />
<style>
html, body, p, div {margin:0;padding:0;}
</style>
</head>
<body>
<script src='https://gw.alipayobjects.com/os/lib/tinyjs/tiny/1.6.1/tiny.js'></script>
<script>
  const config = {
    showFPS: true, // 显示帧频
    dpi: 1.5, // 分辨率
    renderOptions: {
      backgroundColor: 0x2a3145 // 画布背景色
    }
  };

  // 新建App
  const app = new Tiny.Application(config);

  // 新建场景
  class StartLayer extends Tiny.Container {
    constructor() {
      super();

      // 通过 fromImage 实例化精灵
      var sprite = Tiny.Sprite.fromImage('https://gw.alipayobjects.com/as/g/tiny/resources/1.0.0/images/logo.png');
      // 设置精灵的中心点
      sprite.setAnchor(0.5);
      // 设置精灵相对画布的位置,此处设置居中
      sprite.setPosition(Tiny.WIN_SIZE.width / 2, Tiny.WIN_SIZE.height / 2);
      // 将精灵添加到场景中
      this.addChild(sprite);
    }
  }

  // 启动
  app.run(new StartLayer());
</script>
</body>
</html>
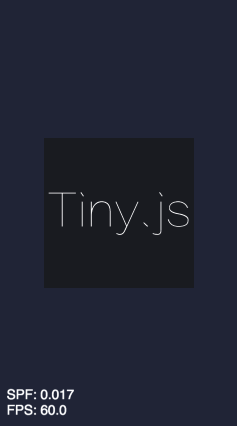
效果如下图:
创建动画
现在,我们看到了运行后的效果,那么,如何让精灵动起来呢?
在 StartLayer 构造函数后添加如下代码:
// 新建 action
const rotateTo360Action = Tiny.RotateTo(2000, {rotation: Tiny.deg2radian(360)});
// 执行 action RepeatForever
sprite.runAction(Tiny.RepeatForever(rotateTo360Action));
看,精灵不停的旋转起来了。
绑定动作
现在,我们想要让精灵对触发的动作作出反馈,比如:点击。
在 StartLayer 构造函数后添加如下代码:
// 设置精灵可交互的
sprite.setEventEnabled(true);
// 绑定 tap 和 mouseup 事件
sprite.on('tap', () => {
  console.log('taped!');
});
使用加载器
对于资源文件较多的项目,加载器是必要的,使用 Tiny.Loader 可以很方便的加载图片、音频等文件。
// 声明资源文件
const resources = [
  'https://zos.alipayobjects.com/rmsportal/nJBojwdMJfUqpCWvwyoA.png',
  'https://zos.alipayobjects.com/rmsportal/kkroUtIawGrWrqOLRmjq.jpg',
  'https://zos.alipayobjects.com/rmsportal/jkgwjYSFHRkorsKaZbng.jpeg',
  'https://zos.alipayobjects.com/rmsportal/HAacythTETlcsPxEePbk.webp',
  '../assets/text.txt',
  'https://os.alipayobjects.com/rmsportal/atrIuwPurrBiNEyWNdQA.ogg'
];
//执行加载
Tiny.Loader.run({
  resources,
  // 加载进度
  onProgress: (per) => {
    console.log('percent:', per + '%');
  },
  // 单个资源加载完成后的回调
  onComplete: (resourceLoader, resource) => {
    console.log(resource.url);
  },
  // 所有资源加载完成后的回调
  onAllComplete: (resourceLoader, object) => {
    console.log('all complete');
    // 这里执行应用的主场景,如:
    // app.run(new StartLayer());
  }
});